I want to create my own test family based on PCI and CIS to use its compliance policy (for both Windows and Linux), is there any template or GUI for creating those families?
In Greenbone the term “family” is used to classify VTs and it is not possible to adjust a VT family via the web interface. However, while you cannot assign VTs to “families” per se, you can create a custom scan configuration for those use cases you mention. To do this you can clone either the “Full and Fast” or “Base” scan configs and then edit them to customize the included VTs as you see fit.
- To to the scan config page from the
Configuration→Scan Configsitem in the top menu bar. - Use the
cloneaction icon at the far right of either theFull and FastorBasescan config items and name your new scan config appropriately. - Use the
editaction icon beside the newly created scan config to open the edit dialog box - Select the families, or individual VTs you want in your custom scan config.
1 Like
Hi @rippledj ,
What I am trying to do is something similar to EulerOS Linux Security Configuration (to access the policy navigate to Resilience ==> Policies), the way I am thinking to create a policy that checks certain files in Linux (for example check /etc/ssh/ssh_config file and verify there is a parameter there PermitRootLogin with a value is set to no) and registries\GPO in Windows (for example make sure Computer\HKEY_LOCAL_MACHINE\SYSTEM\CurrentControlSet\Control\SecurityProviders\SCHANNEL\Protocols path exist and it contains folder for `TLS1.0 …etc). Sadly when I try to create a new policy is mentioned that I need to assign a “family” to it from existing ones which will not cover everything I need.
I’m not exactly sure what you mean by the above statement. Policies are essentially identical to the normal scan configuration data objects in Greenbone. You can customize exactly which NVTs are included or not included without any restriction by NVT family. For example see the process below:
-
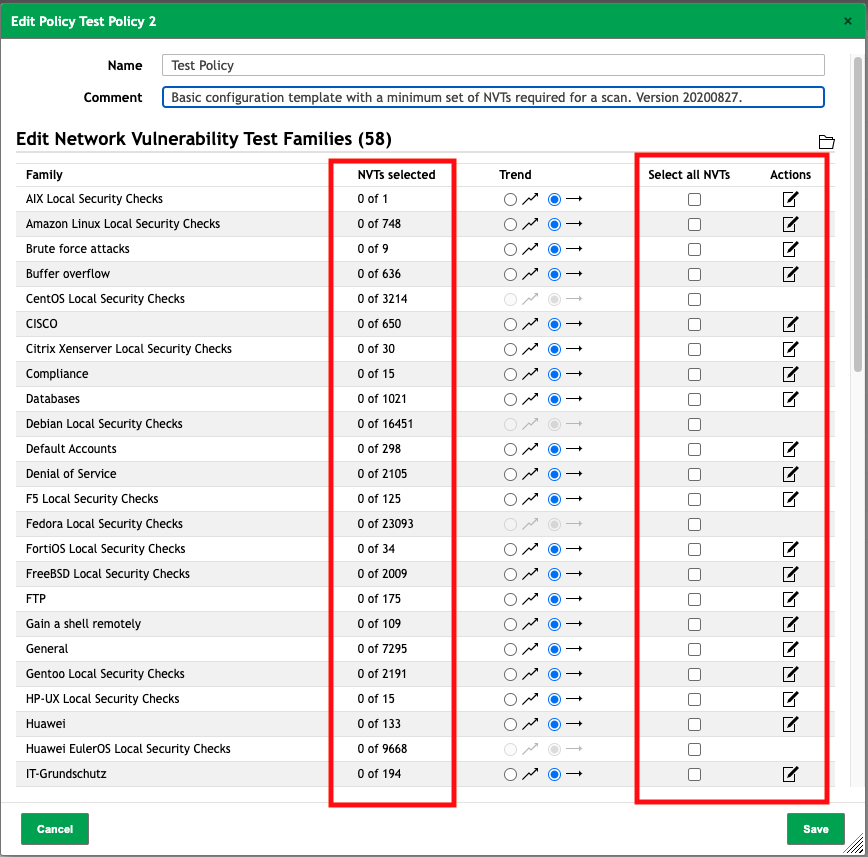
Editing a newly created Policy object you can see there are no NVTs selected. Its a minimum requirements scan configuration. However, you have the option to either
Select all NVTsfrom a family, with the checkbox, or use theActionsedit icon to select individual NVTs from a family see below.
-
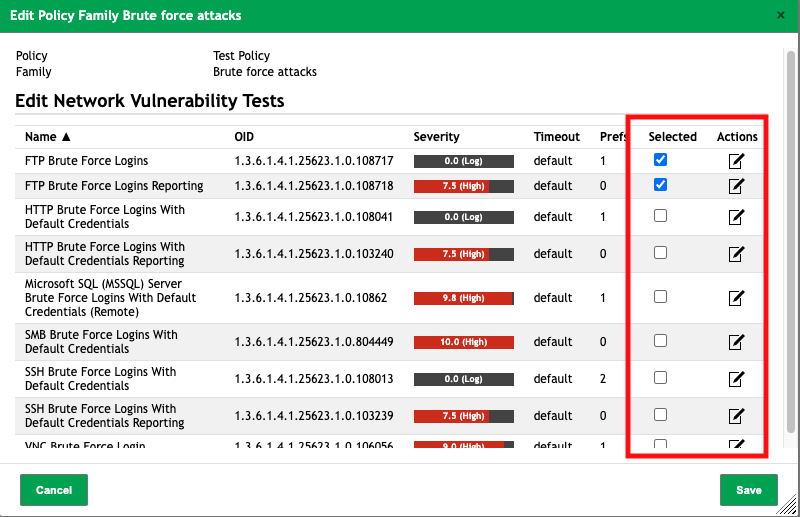
I select only two NVTs from the
Brute Forcefamily and save the policy configuration.
-
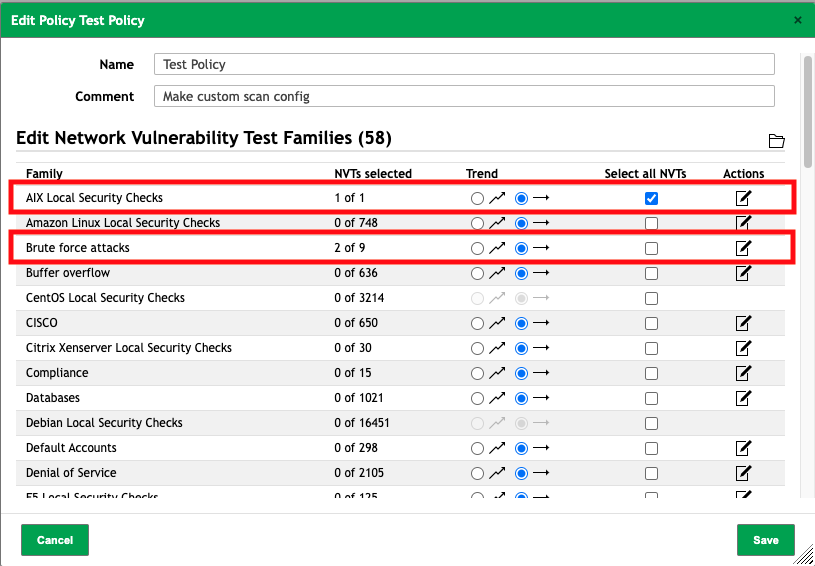
I now have a custom policy / scan configuration with granular control over which NVTs are being executed. You can see from this screenshot that I can add entire families of NVTs (the topmost highlighted family) or granularly select only some (as in the
Brute force attacksfamily).
I hope that helps, otherwise please revise the description of your use case.
Hi @rippledj
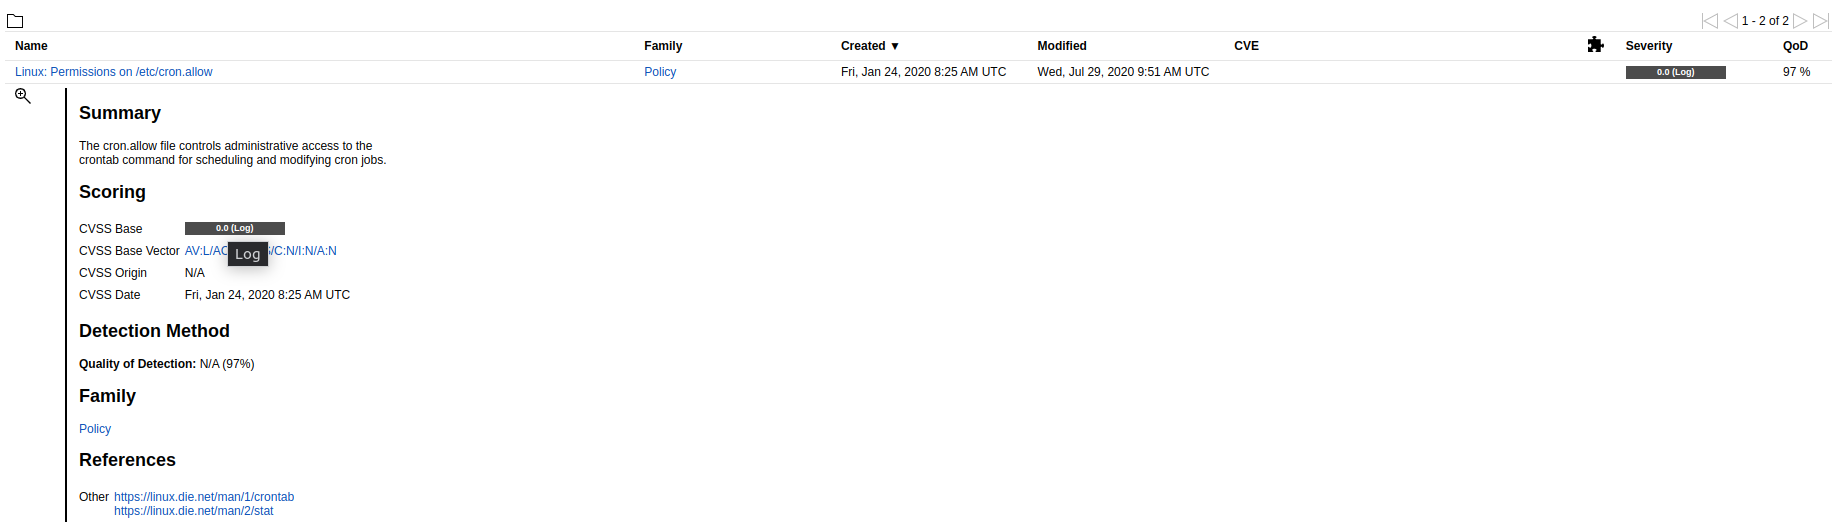
I want to create a policy to check for compliance with certain settings, such as the values in /etc/cron.allow. I want to be able to view the results of this check in an audit, and I want to be able to show a compliance status similar to the screenshot below.
However, when I try to create a new audit, it asks me which policy I want to use, and when I create a new policy, it asks me to use “Edit Network Vulnerability Test Families (58)”. If I don’t select anything and try to run an audit using my newly created policy, nothing happens.


Can you please help me understand how to create a policy compliance audit?
In simpler terms:
I want to create a policy to check if certain settings on my computer are correct. I want to be able to see the results of this check in an audit, and I want to be able to show a compliance status.
However, when I try to create a new audit, it asks me to select a policy, and when I create a new policy, it asks me to select a type of vulnerability test. If I don’t select anything and try to run an audit using my new policy, nothing happens.
I am asking for help understanding how to create a policy compliance audit.
Here are some tips:
- Make sure that I have the correct permissions to create and edit policies and audits.
- When creating a new policy, select the “Compliance Audit” type.
- To create a rule to check the value of a file, select the “Check file contents” condition.
- To compare the result of the check to a specific value, use the “Equal to” or “Not equal to” operator.
- Once I have created my policy, I can create an audit to use it.
Here is an example of one point in a policy compliance audit:
Policy name: My Policy
audit point: Check cron.allow file permission
Conditions:
- Check file owner: /etc/cron.allow
- Equal to: root
- Check file group: /etc/cron.allow
- Euqal to: root
Actions:
- Set compliance status: Compliant
This policy will check the contents of the /etc/cron.allow file and set the compliance status to “Compliant” if the file contains the string “root”.
I combine multiple settings in a single audit to show me a compliance status and percentage when executed on a specific target machine.
In this case, an NVT already exists that can specifically address your policy audit need; to check the cron.allow permissions. However, it does not have a default CVSS score and only registers as a log item. So, you would also have to create an override for that NVT to give it a default CVSS score.
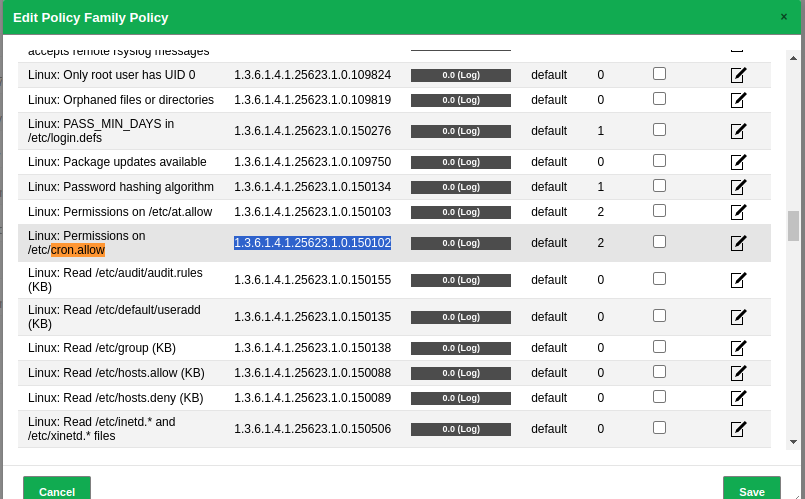
Here you can see by searching the NVTs page I can find a vulnerability test for cron.allow and get its family name. The family name will help me find it when creating a policy configuration.
Then I can edit the policy config as I showed you above and enable that NVT using the Family to find it. Although this isn’t the most user-friendly way to accomplish the goal, it works.
You can enable that NVT and edit any configurable settings it has.
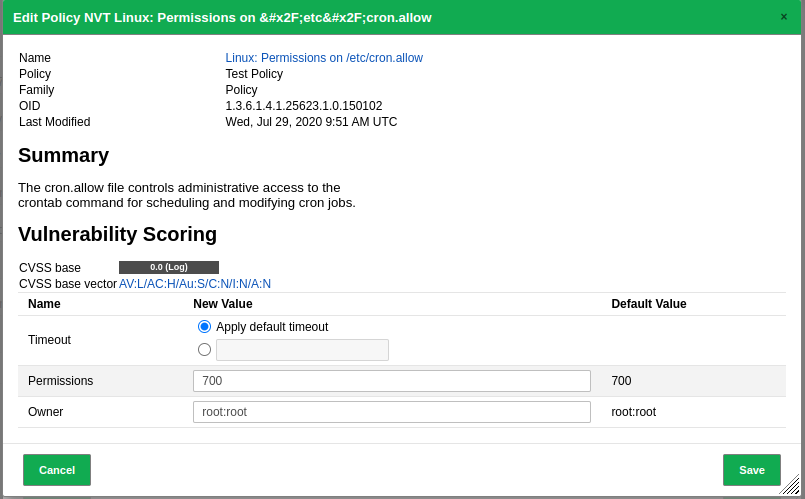
I believe that since this NVT only has a log severity class, you would need to create an override to assign it a CVSS for it to be considered as in the compliance pass/fail.
If you have policy audit requirements that do not have existing NVTs you would have to create a .nasl script that can address it and add it to Greenbone and you can include it in an existing NVT family. From there you can add it to your compliance scan.